Tooth Whitening: The Secret to long-lasting White Teeth
By: Dr. David C. Wood D.D.S.
Tooth whitening is really pretty simple, but with the vast number of whitening products and misinformation out there, many of my patients are left confused and frustrated. Therefore, I decided to spend my first blog post of 2018 explaining the keys to having whiter, brighter teeth!
Step 1: Throw away that “whitening paste”
Think of it this way: there are abrasives and bleaching agents. Most of your standard “whitening” toothpastes contain abrasives that work to mechanically scrub away stain molecules from the surface of your teeth. And while the results often provide the most immediate gratification, they are seldom long-lasting. This is because most toothpastes, especially those with whitening claims, are super gritty and abrasive, and in some cases even harmful to tooth enamel and gum tissue. I see patients on a daily basis with generalized gum recession and enamel abrasion. Most are using improper brushing techniques, highly abrasive toothpastes, and medium-hard manual brushes. This is the WRONG way to go about brightening up your smile!
On the other end of the spectrum, there are “bleaching agents.”Most of these agents have one of two active ingredients, usually carbamide peroxide (CP) or hydrogen peroxide (HP). These compounds work to lift stain from deep within your tooth structure by chemically breaking bonds between stain and tooth. No abrasion or heavy scrubbing required!
Step 2: Decide which bleaching agent (CP or HP) and % is best for your teeth
When it comes to choosing the right agent and % it is often best to consult your dentist first. In my experience, patients with superficial coffee and tea type staining do best with Hydrogen Peroxide in shorter durations (30-60min per day for 1-2 weeks). Conversely, patients with deep, intrinsic brown or gray staining, often caused by antibiotic exposure at a young age, often do better with Carbamide Peroxide worn over a longer duration (4-8 hours per day for 1 week). Sometimes these agents are termed “night whites” due to their longer duration times, and propensity to be worn overnight.
One must also consider strength, which is often displayed as a percentage of HP or CP. I find that most patients are ok to start with around 14% HP or 22% CP, as long as the gel is of professional quality and has desensitizers built in. Some patients do have sensitivity issues, and for this reason there are lower % gels available. The problem with many OTC agents is that there is less choice in terms of %, desensitizers are often not added to save on cost, and many patients use these incorrectly.
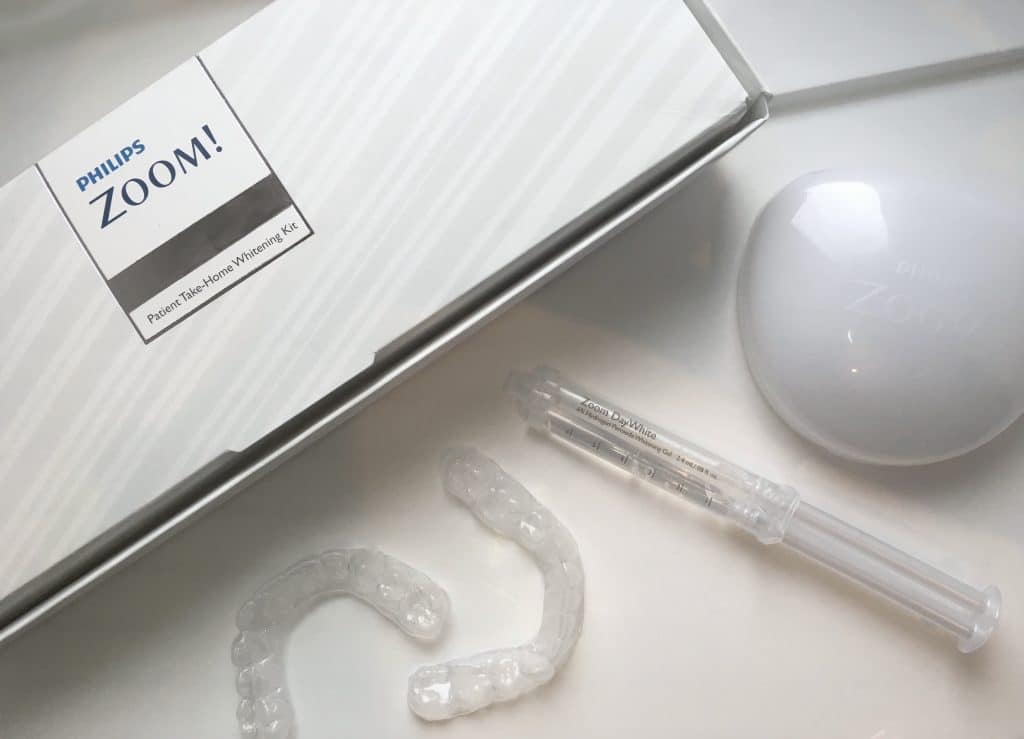
Step 3: Pick a Delivery Form
Once we decide which whitening agent is best, then you must consider the delivery form. Strips and gels are just two examples. So which is better? Sometimes this decision depends on your budget. OTC strips and trays are cheaper in the short-term, but often require more frequent application and touch-ups. While professional trays do come with more cost up front, they pay off in the long run. Some of the best over-the-counter agents, like Crest White Strips, fail to mold carefully around each tooth, leaving patients with a “spotty” whitening effect. In my opinion, the absolute best way to whiten is with custom fitted trays and whitening gel. The teeth simply bathe in the gel, and there is no concern with molding sticky strips.
In the end, the right gel, applied for the right duration will give you the long-lasting results you have been looking for!
Dr. David Wood
David Wood Family Dentistry